This resource suggests ideas for experimenting with mixed media to create a pop-up sculpture.
A creative writing challenge based on props and staging is the starting point for a 3D artwork using collage and paper folding techniques. The resource offers cross-curricular opportunities for English and Art and Design but is structured so that you can choose your subject focus by selecting relevant activities.
The resource suggests ideas for:
experimental approaches to creative writing
using mixed media techniques to create 3D artwork
exploring text art and artworks made from printed texts and books.
This Art and Design and English resource can be used together as a lesson plan or as individual components to integrate into your own scheme of work. It is devised for Key Stage 3 / CfE Level 3 and 4 students but the resource activities could be easily adapted for Key Stage 2 / CfE Level 2 / PS 3. It may also suit Key Stage 4 students / CfE senior phase.
Art and design - Produce creative work, explore ideas - Become proficient in sculpture and design techniques - Evaluate and analyse creative works - Know about great artists and understand the historical and cultural development of their art forms
English Writing - write accurately, fluently, effectively stories, scripts, poetry and other imaginative writing Spoken English - Expressing their own ideas and keeping to the point - Participating in formal debates and structured discussions, summarising and/or building on what has been said
Art and design - Researching, gathering and interpreting information from digital sources - Developing creative thinking skills and personal creative outcomes through investigating, realising, designing and making
Language and literacy Through engagement with a range of stimuli including peers, poetry, prose, drama, non-fiction, media and multimedia which enhance creativity and stimulate curiosity and imagination, pupils should have opportunities to become critical, creative and effective communicators by: - expressing meaning, feelings and viewpoints - talking to include debate and group discussions - listening actively and reporting back - writing and presenting in different media and for different audiences and purposes
Expressive arts - I have experimented with a range of media and technologies to create images and objects, using my understanding of their properties (EXA 3-02a) - While working through a design process in response to a design brief, I can develop and communicate imaginative design solutions (EXA 3-06a) - I can respond to the work of artists and designers by discussing my thoughts and feelings. I can give and accept constructive comments on my own and others' work (EXA 3-07a)
Literacy and English - When listening and talking with others for different purposes, I can: communicate information, ideas or opinions; explain processes, concepts or ideas; identify issues raised, summarise findings or draw conclusions (LIT 3-09a) - I enjoy creating texts of my choice and I am developing my own style. I can regularly select subject, purpose, format and resources to suit the needs of my audience (LIT 3-20a) - I can consider the impact that layout and presentation will have on my reader, selecting and using a variety of features appropriate to purpose and audience (LIT 3-24a) - I can engage and/or influence readers through my use of language, style and tone as appropriate to the genre (ENG 3-27a) - I can recreate a convincing impression of a personal experience for my reader, sharing my feelings and reactions to the changing circumstances with some attempt at reflection (ENG 3-30a)
Art and design - Students use their knowledge about the work of other artists to enrich and inform their work - Students explore, experiment with and apply the visual, tactile and sensory language of art
English Oracy - Respond orally to continuous and non-continuous texts - Respond orally to a variety of stimuli and ideas, including written and dynamic texts, e.g. paintings, music, film, still and moving image - Communicate for a range of purposes, e.g. recount and present information, instruct, argue and explain a point of view, discuss an issue, persuade, question and explore interpretations, convey feelings - Speak and listen individually, in pairs, in groups and as members of a class
Writing - Produce poetic writing, using imagery and poetic devices, e.g. rhyme and form - Use a wide range of written and dynamic stimuli, e.g. stories, picture books, images, poems, experiences, film, paintings, music
Exploring the expressive arts is essential to developing artistic skills and knowledge and it enables learners to become curious and creative individuals.
Progression step 4:
I can explore and experiment with my own and others’ creative ideas, demonstrating increasingly complex technical control, innovation, independent thinking and originality to develop my work with confidence, being able to explain my reasons behind choices made and evaluate their effectiveness on my creative work
I can explore creative work, understanding the personal, social, cultural and historical context, including the conventions of the period in which it was created.
I can investigate and understand how meaning is communicated through the ideas of other artists and performers.
Responding and reflecting, both as artist and audience, is a fundamental part of learning in the expressive arts.
Progression step 4:
I can effectively evaluate my own creative work and that of others showing increasing confidence to recognise and articulate strengths, and to demonstrate resilience and determination to improve.
I can apply knowledge and understanding of context when evaluating my own creative work and creative work by other people and from other places and times.
I can evaluate the effectiveness of a wide range of artistic techniques in producing meaning.
Creating combines skills and knowledge, drawing on the senses, inspiration and imagination.
Progression step 4:
I can use my experimentation and investigation to manipulate creative work with purpose and intent when communicating my ideas.
I can apply specialised technical skills in my creative work.
I can purposefully use my design skills and apply a range of solutions to clarify and refine final creative ideas.
I can draw upon my experiences and knowledge to inform and develop strategies to overcome creative challenges with imagination and resilience.
Languages, literacy and communication
Literature fires imaination an inspires creativity
Progression step 4:
I can explore a wide range of genres, experimenting with language choices and techniques for my own creative purposes.
I can use my imagination and experiment with different creative forms and techniques to create my own literature.
I can explore, analyse and compare key ideas using relevant terminology, supporting my views with relevant textual detail.
I can appreciate literature, showing empathy and understanding that literature can be interpreted differently.
Introduction
This learning resource is based on a workshop developed by illustrator and book sculptor Lucy Roscoe and writer Mary Paulson Ellis, author of the best-selling detective novel The Other Mrs Walker.
The inspiration for the workshop came from a sculpture made from the pages of a book which is in the collection of the National Library of Scotland. The sculpture was loaned to Firhill High School in Edinburgh where the workshop took place, a process that was supported and facilitated by Art UK.
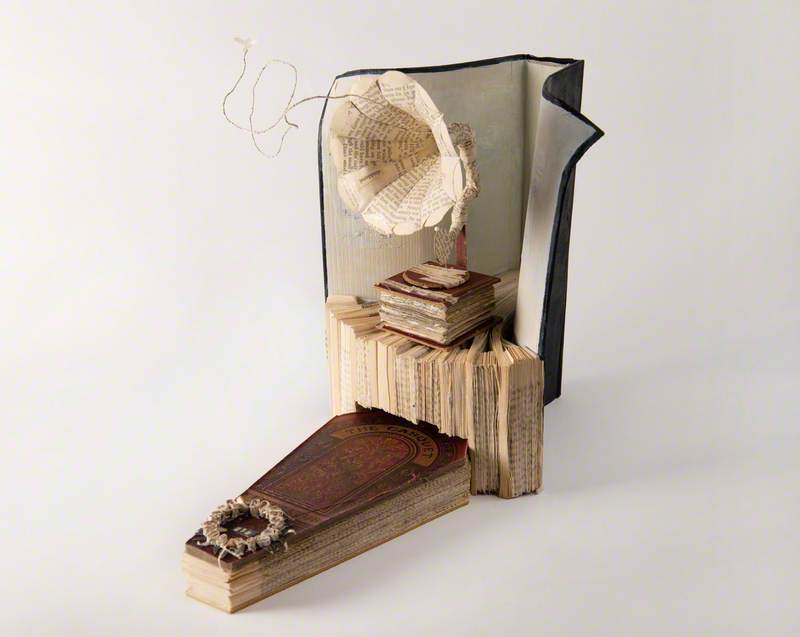
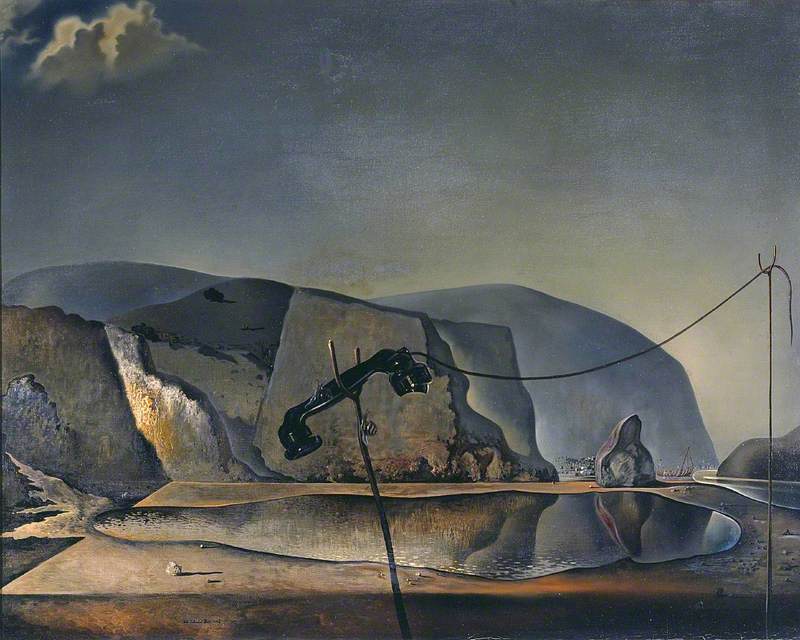
Exit Music was crafted from the pages of Ian Rankin's novel of the same name. It depicts a gramophone and a coffin and was originally accompanied by a note which read, 'A gift in support of libraries, books, ideas... (& against their exit)'. The sculpture appeared in the National Library of Scotland in June 2011 and is one of several now-famous Scottish book sculptures anonymously created and donated across Edinburgh between 2011 and 2016.
Setting the scene
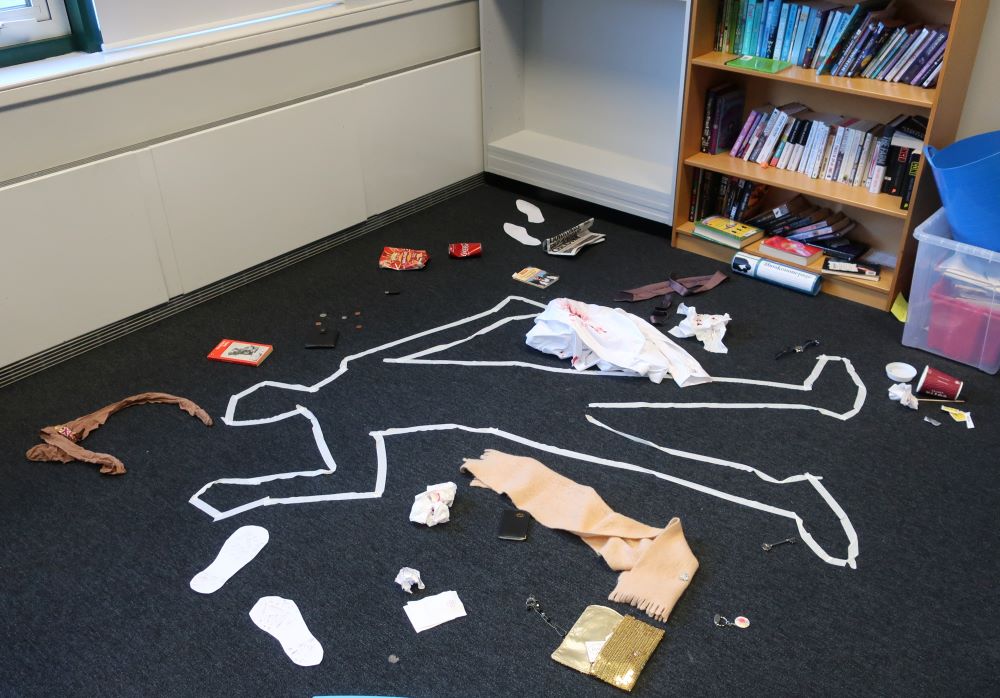
Before the lesson begins, set up your scene in the classroom. Arrange props such as furniture and objects to suggest that an incident has taken place in the room.
Inspired by the crime genre of Ian Rankin's books, Mary Paulson Ellis staged a crime scene using tape stuck to the floor in the shape of a body and various objects scattered around.
Staged crime scene for schools workshop
Your staged scene doesn't have to be a crime scene. You could arrange objects and furniture to suggest a domestic event or conversation.
If you are studying a book or poem in class, you could create a scene from the book, as a way of introducing the book, its characters, narratives, themes and atmosphere to students.
Activity: develop and share narratives
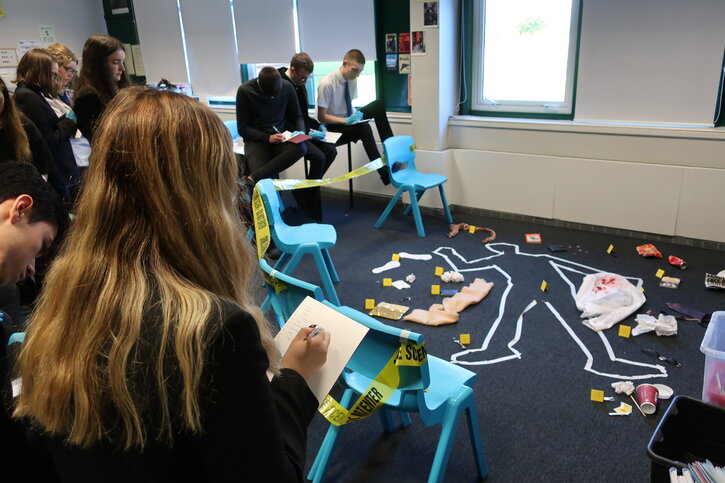
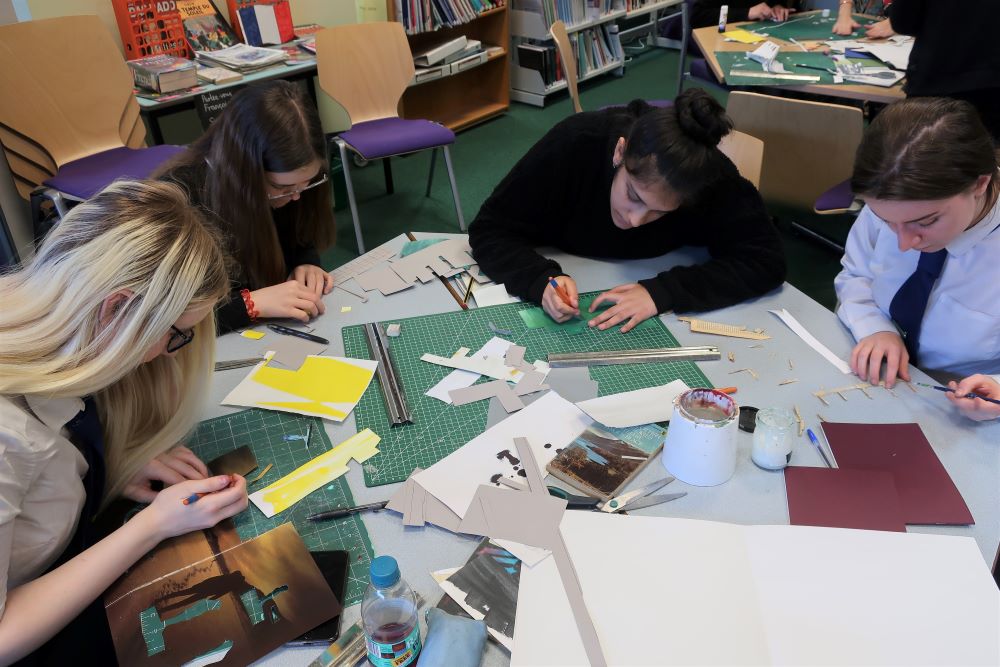
Gather students around the staged scene and ask them to write some notes and ideas about what they think might have happened there, inventing characters and a narrative inspired by the objects.
Students investigate their crime scene
If students are struggling with getting their ideas flowing, these prompts might be helpful:
what objects can you see and how are the objects arranged?
what type of person can you imagine using or interacting with these objects?
what do you think happened here? What clues can you see?
how many people were involved, who were they and what was their relationship with each other? What were the people doing? Were they talking or were they silent?
what time of day was it?
what was the atmosphere like?
If your scene relates to a book that students are studying, tailor your prompts to introduce the characters and themes in the book.
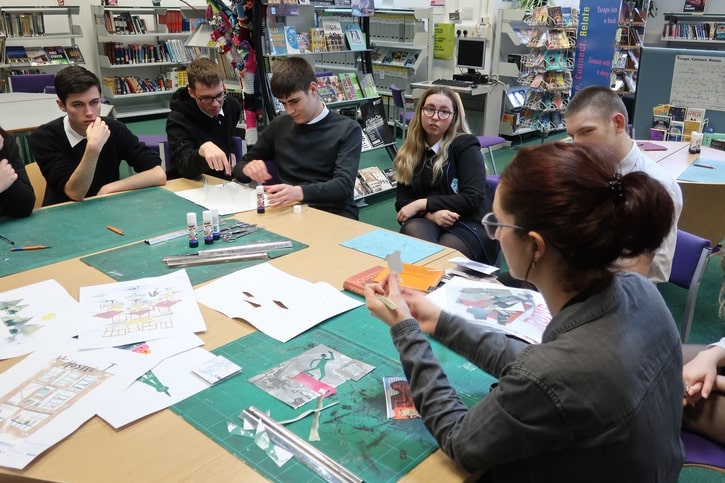
Once students have made notes, ask them to share their thoughts and ideas about what they think happened there and who the characters are.
They could also think about what the next scene might be (and how the story might end). This will encourage students to think creatively about writing, and also to gain confidence in articulating and voicing their ideas and working collaboratively with others.
Development suggestion: creative writing assignment
Task students with developing their ideas from the 'setting the scene' discussion into a creative writing outcome.
This could be either a short story or play or poem.
Encourage them to explore language, vocabulary and description to create a sense of drama and bring the scene to life.
Development suggestion: improvising a drama
You could also ask students to act out the scene and what might have happened there.
They could take on the roles of different characters and improvise a spoken narrative.
Activity: create your 3D pop-up scene inspired by literature
Discussion: books into art
Introduce some of the techniques and approaches that artists have used to create 3D artworks inspired by – and made from – books.
Look at the four artworks below. (You can find out more and see additional views and detailed images of the artworks by selecting the individual images to visit the artwork pages on Art UK.)
Discuss the sculptures and the artists' techniques as a class. Use these prompts if helpful to get the discussion going. (It might be helpful to briefly outline for students the books included or referenced in the artworks):
describe the artwork. What does it show?
what book is the artwork inspired by? (Do you know what type of book this is?)
how has the artist referenced the book? Have they created a literal representation of the themes or narratives or a symbolic one that expresses the atmosphere of the book?
what techniques have they used?
Book Sculpture of a Gramophone and a Coffin Fashioned from a Copy of Edinburgh-Based Author Ian Rankin's Book 'Exit Music' 2011
unknown artist
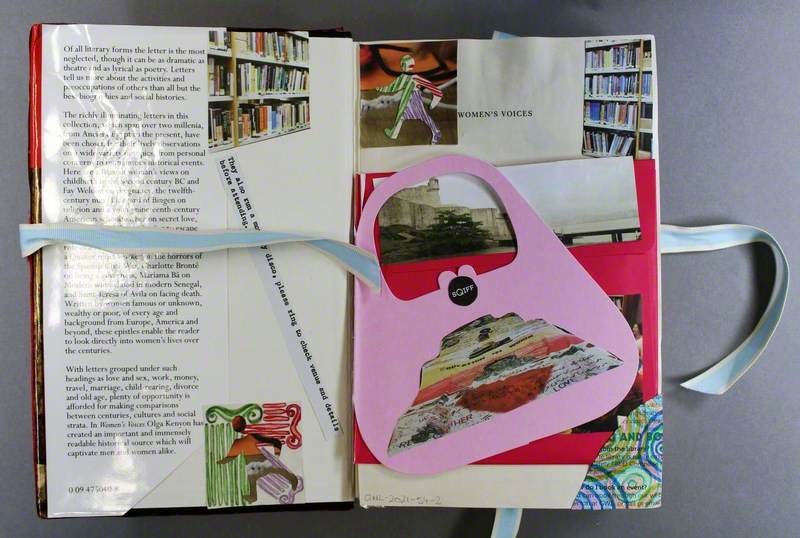
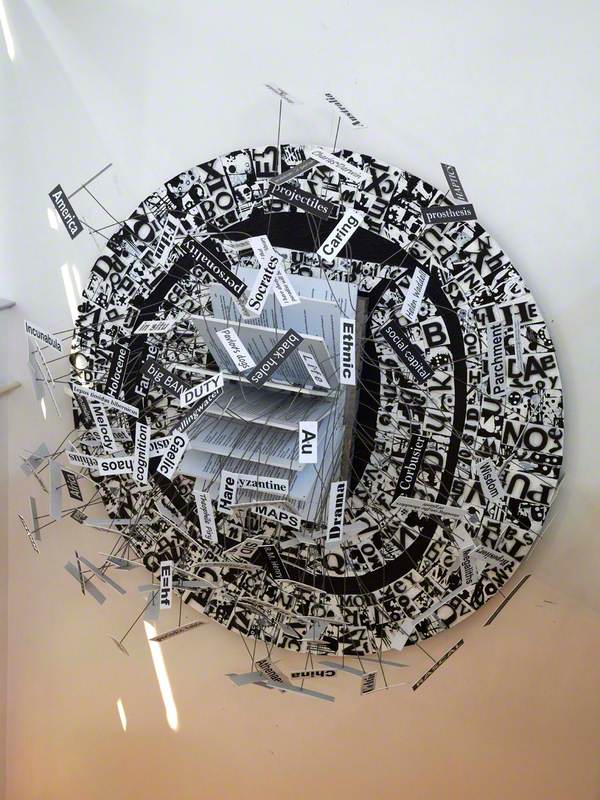
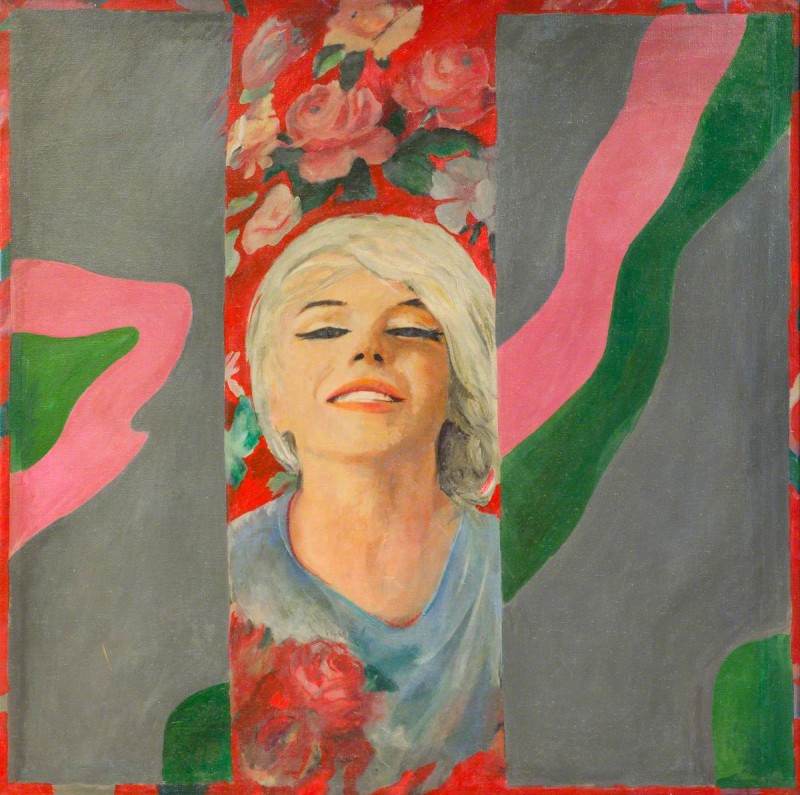
Untitled: 'Women's Voices' 2021
Ingrid Pollard
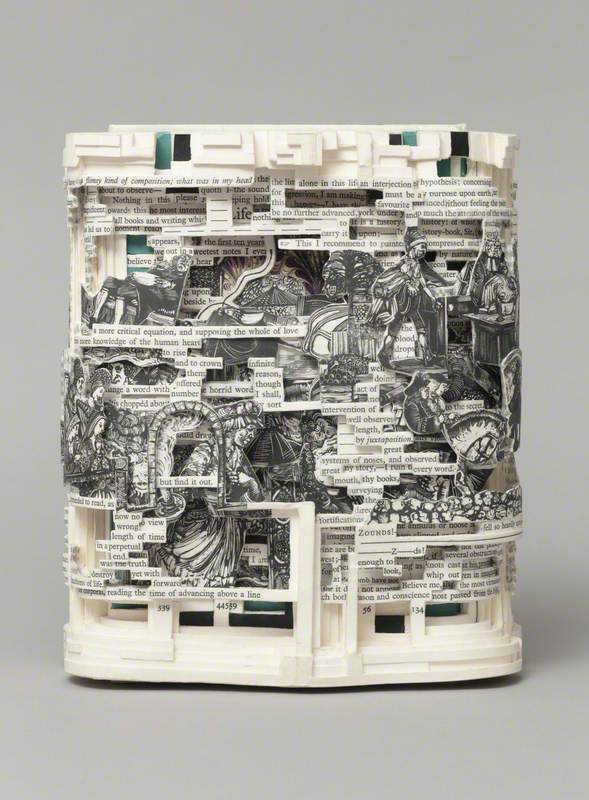
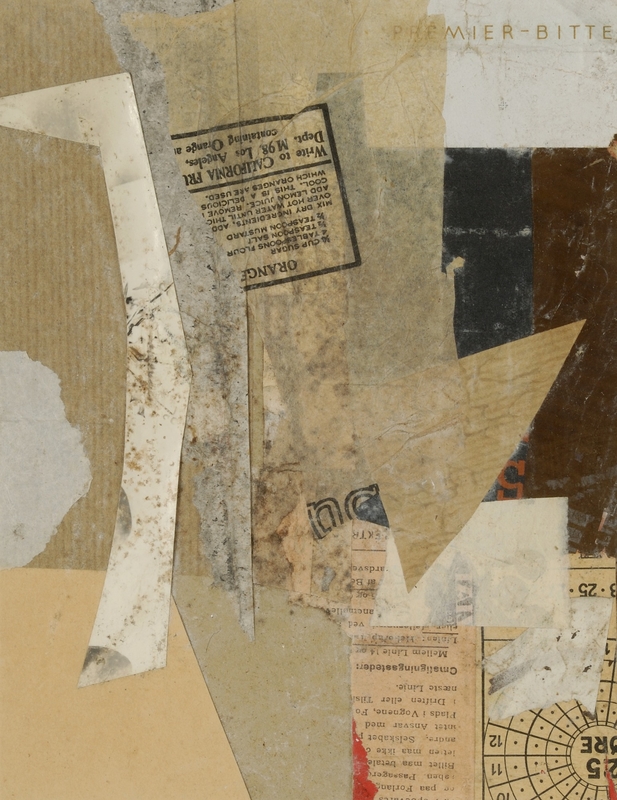
Tristram Shandy 2014
Brian Dettmer (b.1974)
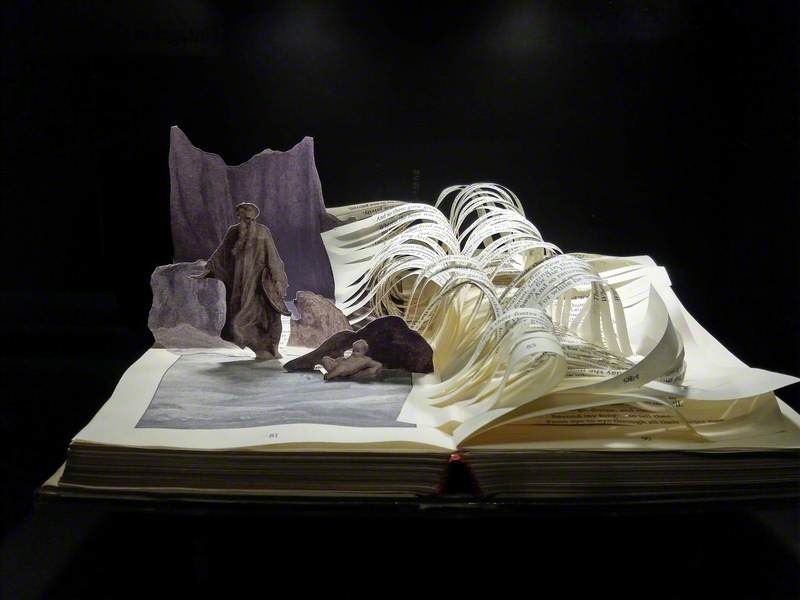
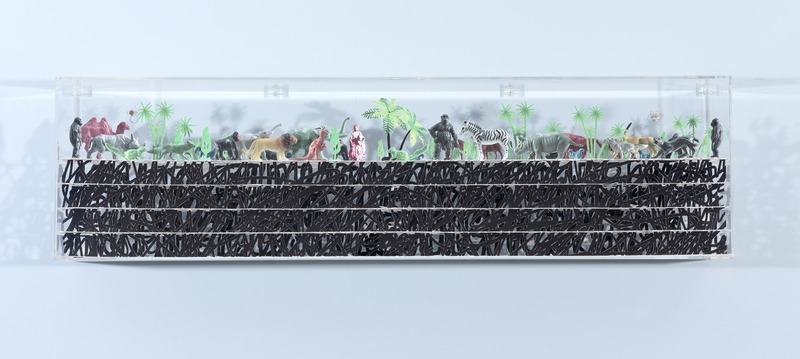
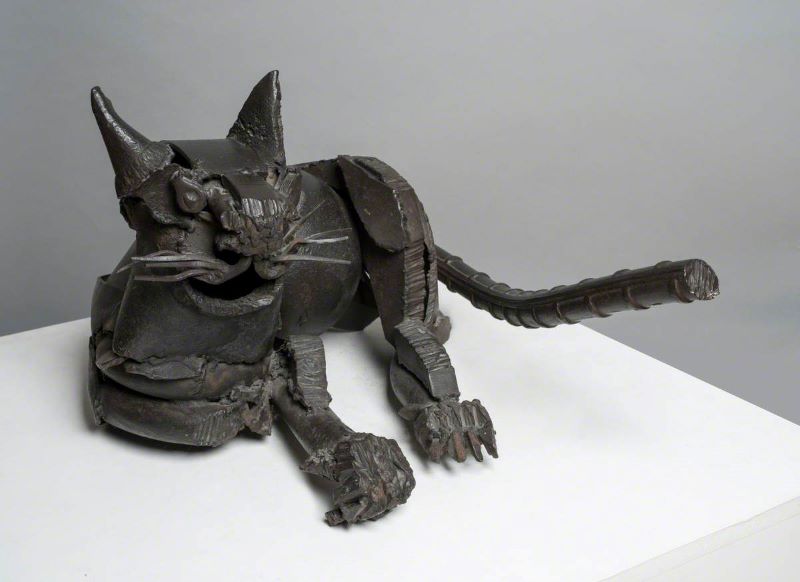
Merlin and Arthur 2015
Justin Rowe (b.1972)
Activity introduction
Now task students with creating a 3D pop-up scene using collage and mixed media.
They could create a scene inspired by their own stories from the written activity above.
Or you could task students with creating a scene from a book, poem or play that you are studying – or choose one from their favourite book.
Materials
old books, magazines and/or catalogues that you don't mind cutting up – it's great to have a mix of text and coloured images to work with
thick paper or card (recycled card such as old cereal boxes, Christmas cards, etc., would work well)
glue or sticky tape
a ruler
scissors/craft knife and cutting mat
Method
First steps
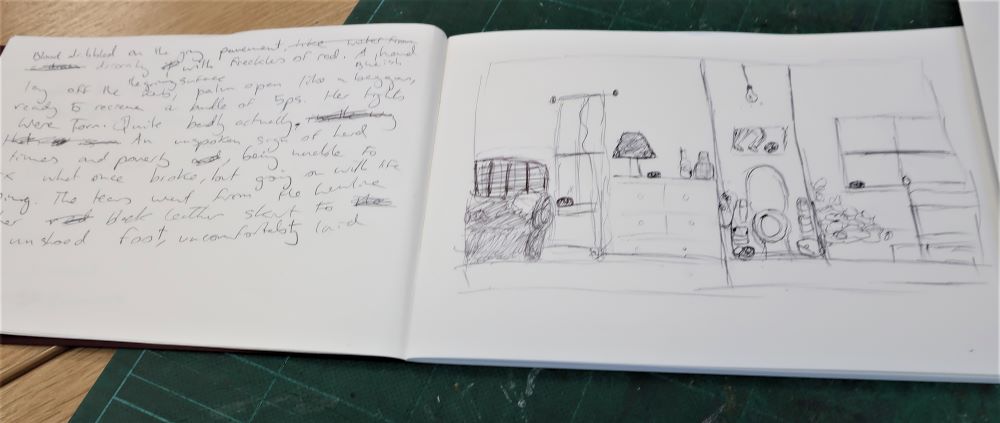
Before students get started, ask them to think about the scene that they'd like to recreate. It may help to sketch some ideas. They will need to think about where the scene is set, what objects and other elements they will include and if they will include characters. Encourage them to also consider the atmosphere and mood of the scene too.
Student sketch and notes from the workshop
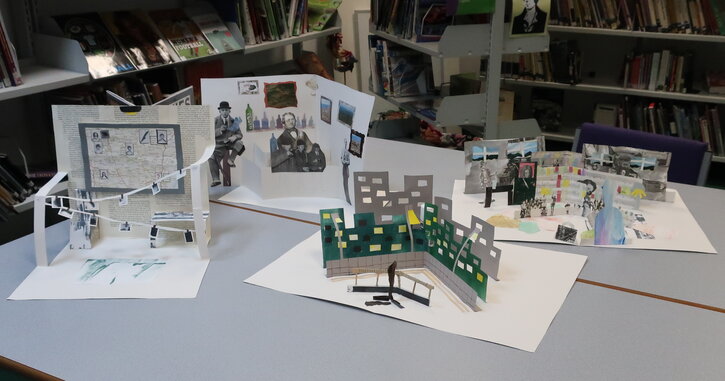
The pupils at Firrhill created noirish lamp-lit streets, well-stocked bars and the detective's apartment all found in Rankin's Exit Music, but their scenes can be something completely different.
Some examples of the students' pop-up crime scenes
Your students' choice of scene may be dictated by what images are available to cut up so encourage them to look at their options! If what is available isn't an exact match with what they have in mind, suggest they find images that would do to put across the right 'feel'. Part of the fun of collage is bringing together an unexpected combination of images!
Activity instructions
Teachers note
These step by step-by-step instructions have been voiced directly to students so that you have the option of tasking them with following the activity at their own pace.
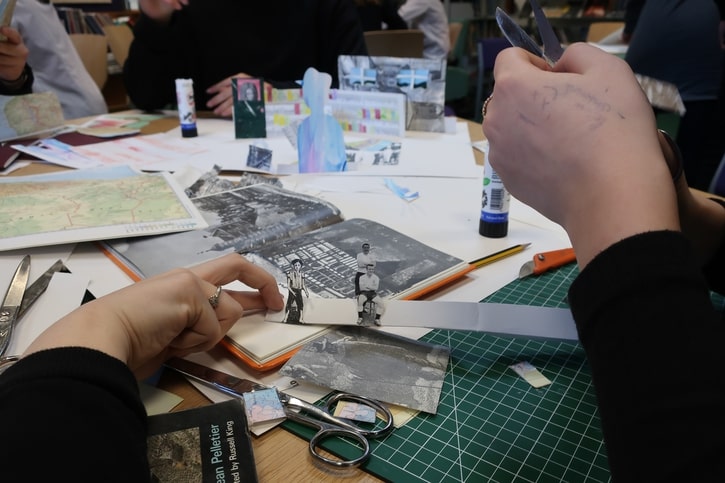
For cutting out the images to be used in the pop-up scene, students at Firrhill used craft knives and cutting mats. Scissors are a safer alternative, especially for younger students, and will work well if students take their time cutting.
Students cutting out images for their pop-up scene
Students will need to be supervised if using craft knives and may need help with attaching the different elements of their pop-up scene.
Step 1: choose and cut out your images
Flick through the book and magazine pages and find the images you want to use. These might include figures, objects, buildings, plants and patterns (that you could use for wallpaper, rugs etc.)
You could also think of using pages or passages of text to give your collage a book-like feel. Using coloured images against the black-and-white of a printed page would make for great contrast and visual impact.
Once you have found a selection of images that you're happy with, cut them out and put them to the side for now.
Lucy Roscoe cuts out a figure for use in her collage
Step 2: make your base
To create the base for your pop-up structure, fold a piece of thick paper or card in half, open it back out and lay it flat on a surface.
Step 3: create your layers
Think about the various pop-up layers you need for your scene. These will be attached to the base.
For instance, if you are creating a room, you might need a larger layer at the back to act as a wall. (If you are creating an outdoor scene. The large back layer could be a building or a sky with hills and trees.)
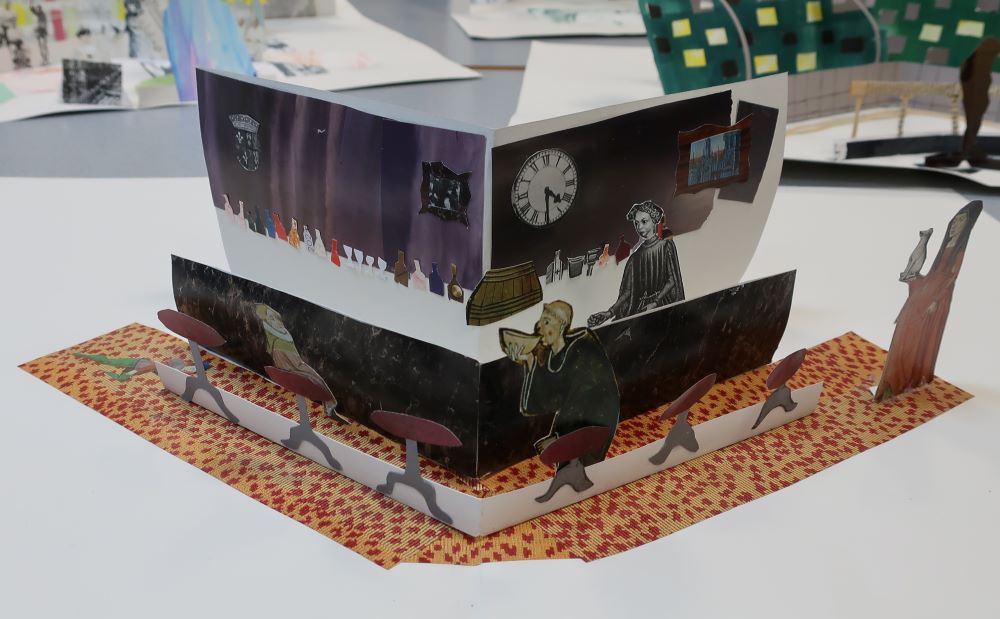
You then may decide to add a medium-sized layer for a table or shelves in front of this, and a smaller one for a person sitting or standing in front of the table. (See the example below.)
You can create as many layers as you like, but put your largest layers at the back, with the layers getting smaller as they move forward.
Bar scene from 'Exit Music' showing the descending layers
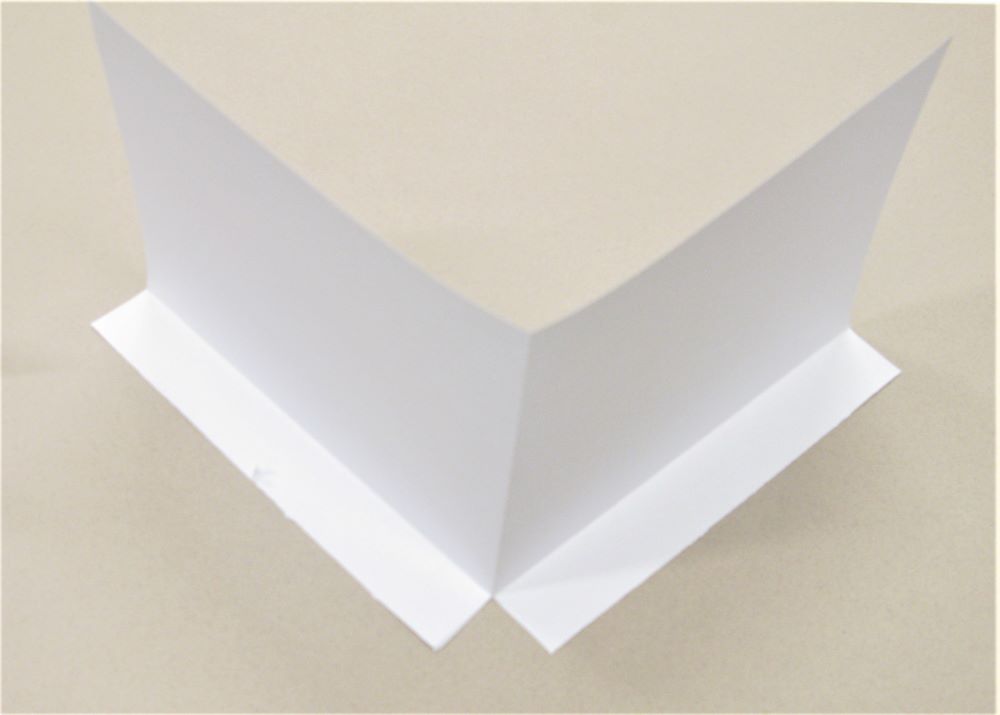
Cut out each layer, then fold 1–2 centimetres at the bottom to create a flap so that you can glue the layer to your base.
Then fold the layers vertically: in the middle, if you're creating an even backdrop (for example a corner of a street or room with the same size of walls on either side). Or fold it at a point that works for your scene, such as one-third along if we'll be peering into a rectangular living room, or if you want to arrange furniture or objects toward one side of your scene.
Layer folded and with a fold at the bottom for attaching it to the base
Step 3: set your scene
Glue your figures and/or objects to each layer to reflect the scene you are recreating.
Students glue cut-out images to one of their pop-up layers
Step 4: make it pop!
Once you're happy with each layer, attach the bottom flap of the layers to the base sheet of the card using glue or tape. The flaps of each layer should be stuck down behind the layer so that they are hidden.
Make sure the vertical fold in each layer is at a 90-degree angle before sticking it down, as if it's an arrow pointing either towards or away from you.
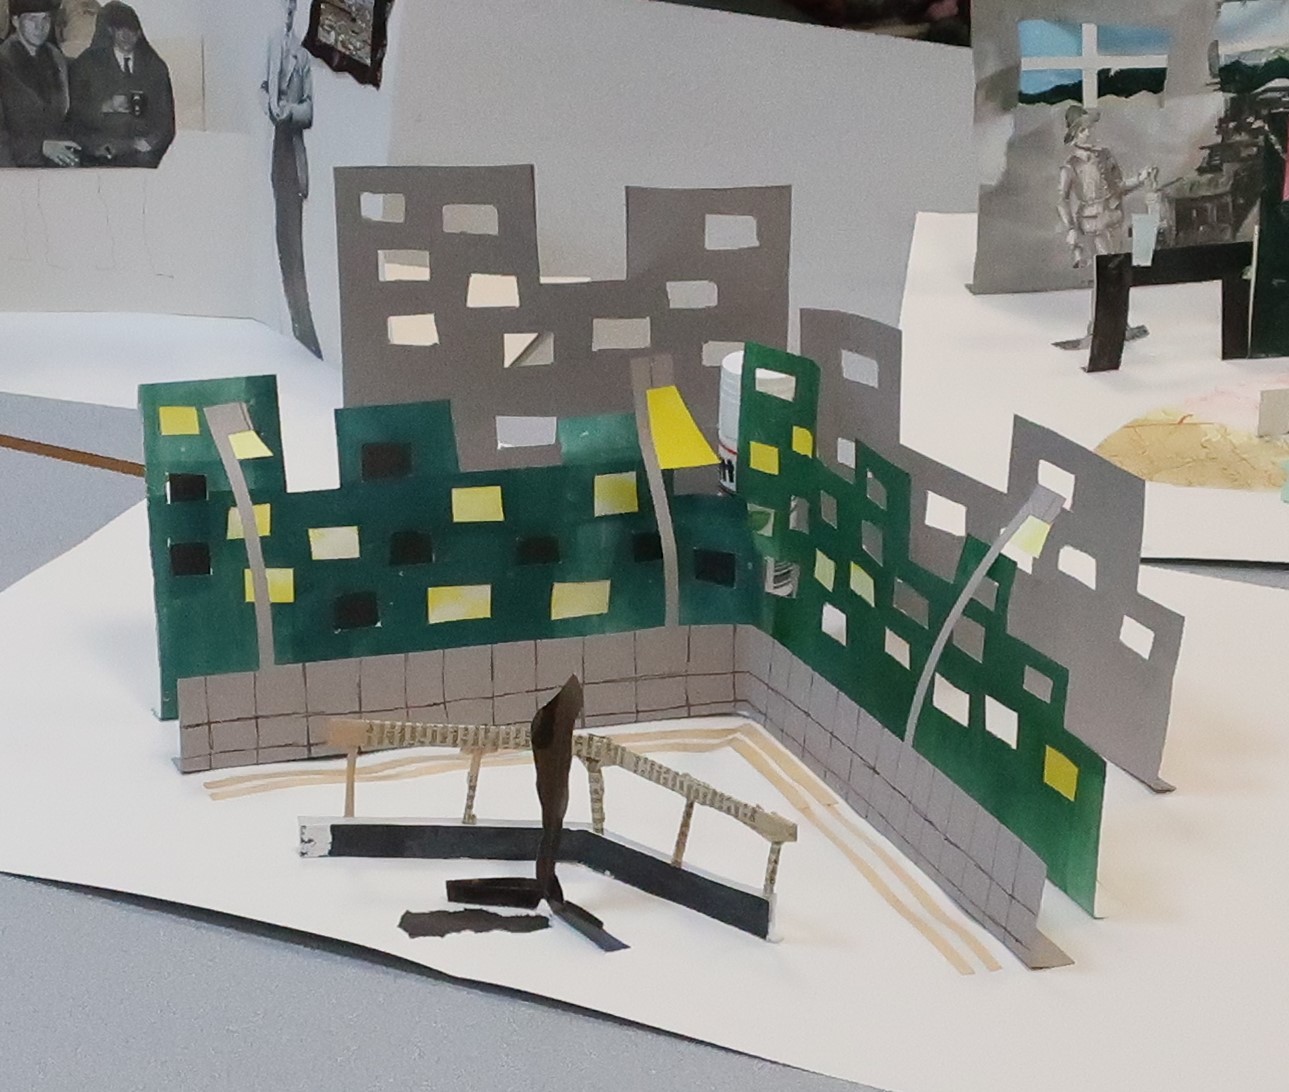
Cityscape with folds lined up in an arrow formation
Line up the vertical folds of your wall and other layers with the main fold in the base so that your overall structure will be able to close in on itself and pop up again without any issues.
Variations
You could start off with a simple scene with two or three layers, then try your hand at making something more elaborate.
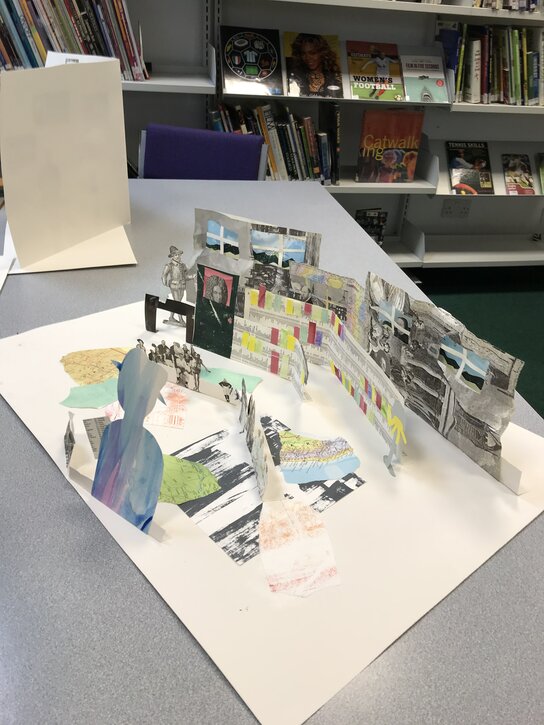
A multi-layered recreation of the Scottish Poetry Library scene in 'Exit Music'
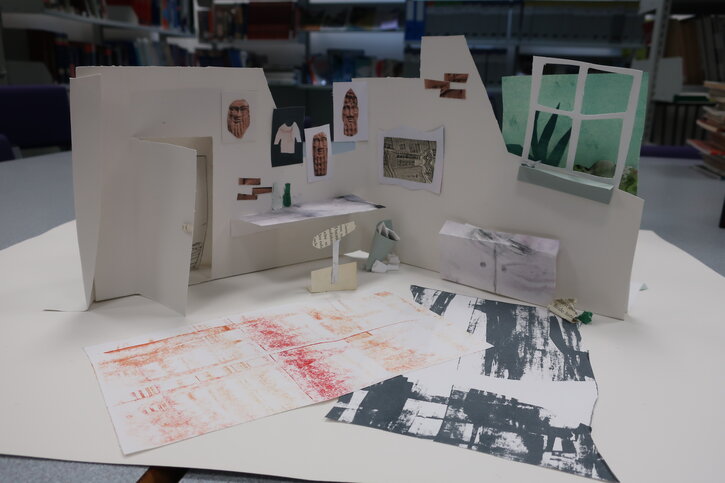
You don't have to create a pop-up structure – you could create a static scene with elements added to one large layer like the one below. This will allow you to focus on adding more details and features.
An example of a static pop-up with lots of attention to detail
Extension activity ideas: visual poetry and experimental compositions
Writers and poets have often explored experimental ways of creating narratives and presenting them visually. For example, Surrealist poets used the game of consequences to inject the unexpected into their writing. Concrete poets created visual poetry, by presenting texts in shape form so that they could be looked at as well as read, the shapes echoing and emphasizing the words.
You can find out more about visual poetry in this 'Words into art' resource
Have a go at exploring experimental approaches to developing and presenting narratives with your students. These activity suggestions have been inspired by artworks that incorporate words or text in a non-linear way.
Mixing it up
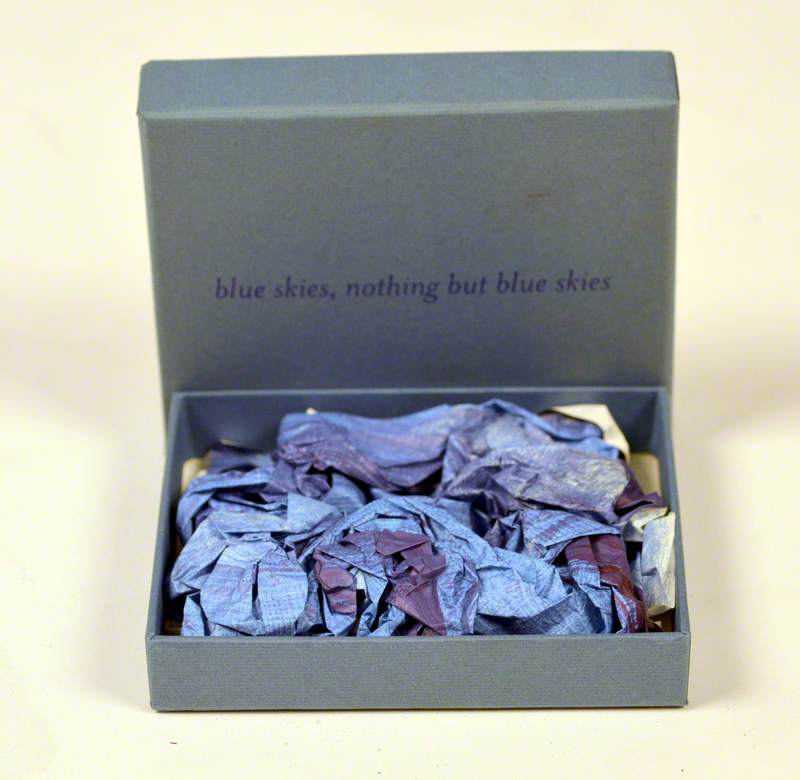
What happens to a narrative if it is written on hanging labels with no obvious order?
Dear Ruth / Dear Eddie, by Amy Pennington, consists of brown luggage labels hanging from a wooden framework. On the labels are quotations taken from the letters of Ruth and Eddie Frow, founders of the Working Class Movement Library in Salford. The installation was part of Object Lessons, an exhibition curated by Sophie Perry in collaboration with the Library and Islington Mill (both in Salford). Amy Pennington was one of eight artists commissioned to respond to pieces from the archive.
Ask students to write sentences or words on separate labels. The text could relate to a theme or mood – such as 'the seasons' or 'loneliness'. Or they could be inspired by literature or poetry that you are studying in class.
Hang them from the ceiling to create an installation that can be interacted with. The texts can be read in any order and form a new, unexpected narrative.
Write or attach single words or short sentences onto each face of a large cube (such as a child's building block) or small cardboard box. (If using single words try and include a mix of nouns adjectives or verbs.) You could organise students into groups to suggest different words and create their dice.
Throw the cube – as if throwing dice and write down the word or sentence that lands face up. Repeat this several times until you have a poem – or a starting point for a poem. It doesn't matter if the same word or sentence is repeated, this will add an unexpected emphasis or rhythm to your poem.
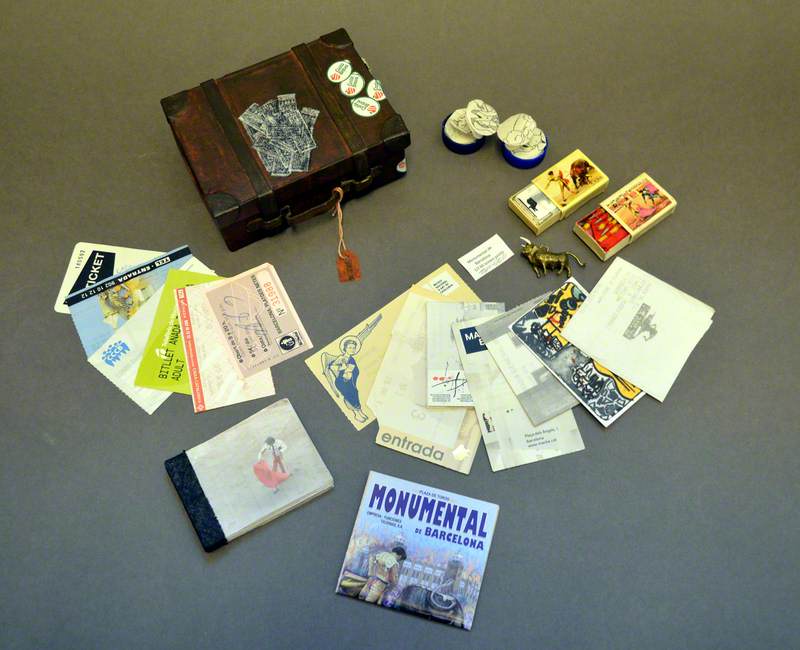
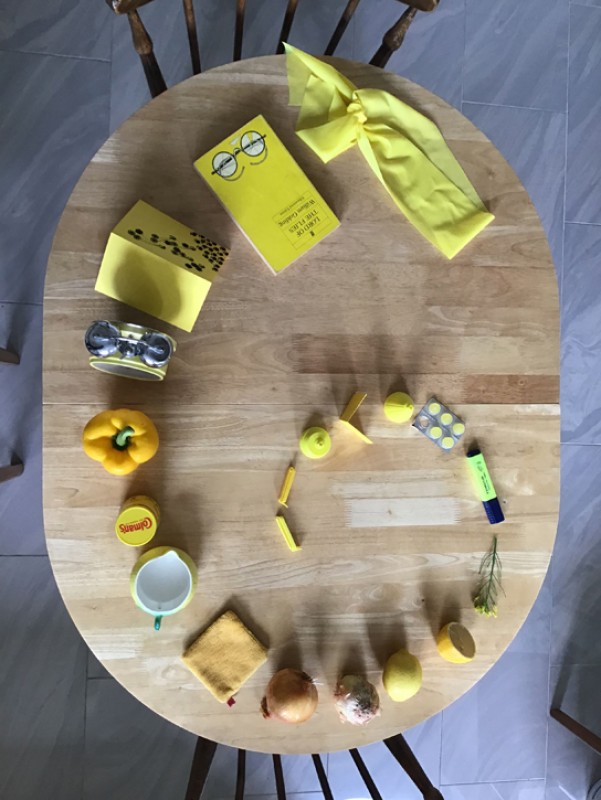
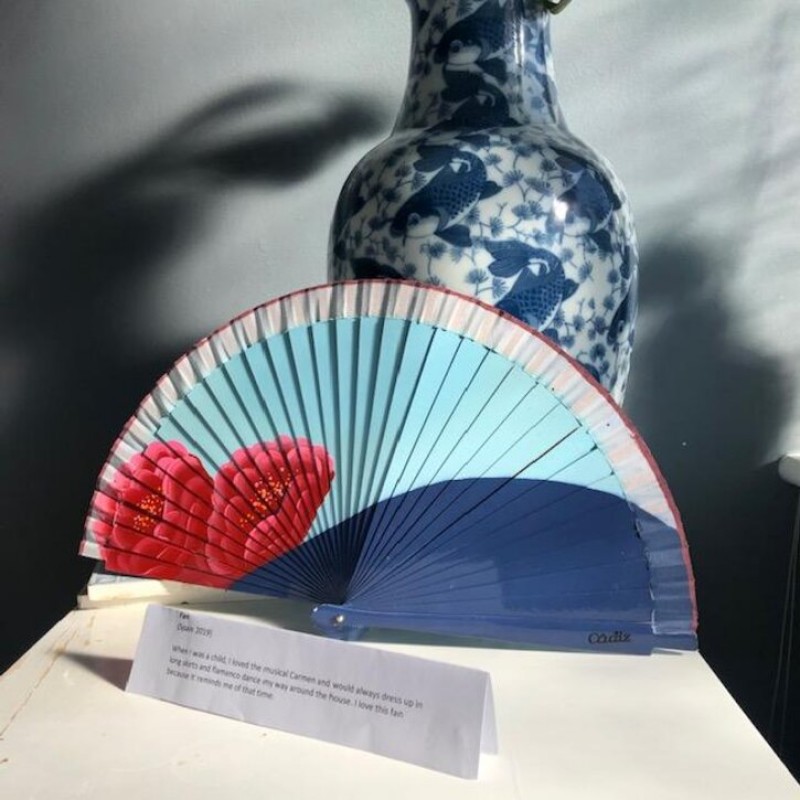
Objects that tell stories
For this artwork, Stephanie Turnbull gathered a series of objects that reflected her experiences of a visit she made to Barcelona. Objects included bus tickets, train tickets, matchboxes, sketches and other handmade objects.
Task students with gathering objects that tell their story of a day out or a weekend. This could be set as a homework project.
Students could collect physical objects or photograph objects and sketch and make mini artworks to reflect their experiences. They could then create a mini exhibition of these objects, presenting them as a visual narrative.
Or you could ask students to work in pairs and to each write a short narrative, story or poem using their partner’s objects as inspiration.
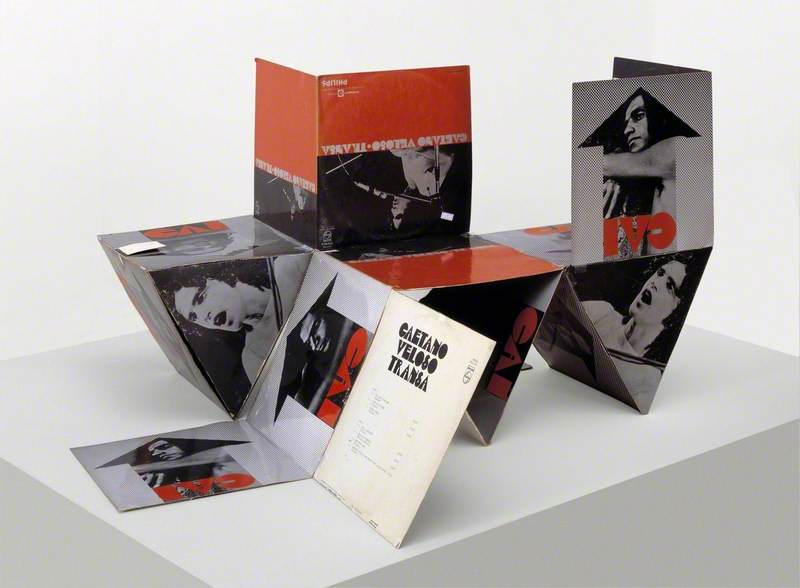
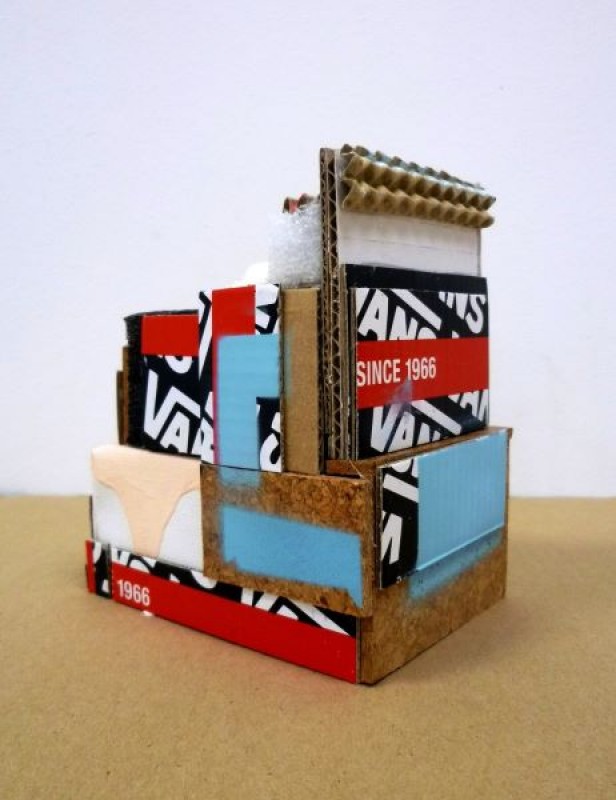
Words, pictures and structures
Brazilian artist Andrade Tudela made this sculpture from the printed sleeve of an album by musician and political activist Caetano Veloso. The album was recorded after Veloso's return to Brazil from self-imposed exile in London. The album includes an eclectic combination of musical styles. In Transa, Andrade Tudela gives literal form to a number of ideas that reference Veloso's life and music including exile and return, the shifting style of his music and the relationship between politics and aesthetics.
Task students with using photographs and words to put across a narrative or express an issue that is important to them.
They could attach images and texts to a structure of 3D shapes made from folded card.
Or they could use dowelling or craft straws to create a structure and then attach the images and texts to this.
Students could use found images (from magazines or the internet), photographs they have taken themselves, or drawings.
Explore more mixed media text artworks
Use the carousel below to browse a selection of mixed media artworks that incorporate printed text or pages from books. Use these to inspire more text in art projects.
You can also explore artworks in this 'Text in art' Curation